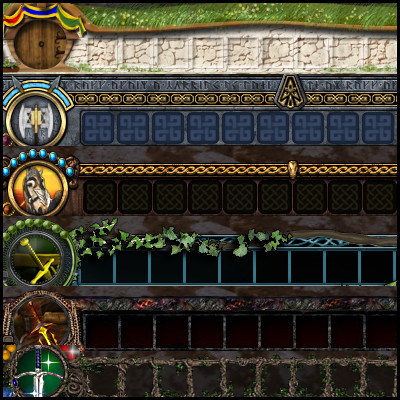
User Interface (UI) skins are a neat way to spice up the look of your game and give it a fresh coat of paint. Because MMOs will require many hours staring at the screen, some of the colors or look of the various bars and windows may start making you a bit weary/sick. By setting up some new UI skins, you may find it feeling like a whole new game (even though these skins have no impact on the actual gameplay). When it comes to LOTRO, one of the most popular collection of skins you can get is the JRR Skin Collection. This will offer you roughly 25 skins (and different size variations of a couple skins) that you may load through your options menu (search for skin at the top, and you’ll easily find it in the UI Settings). The instructions to get it set up can be found on that page, so I won’t reiterate that here.
Because skins change the general appearance of many UI elements, one downside you may notice is that these skins may alter the size of your in-game map, as shown in the image below. Some users may not mind this change, while others may not be a big fan of the size difference. Fortunately, there is a fairly easy fix you can do through your skin files that will restore the default-size map.
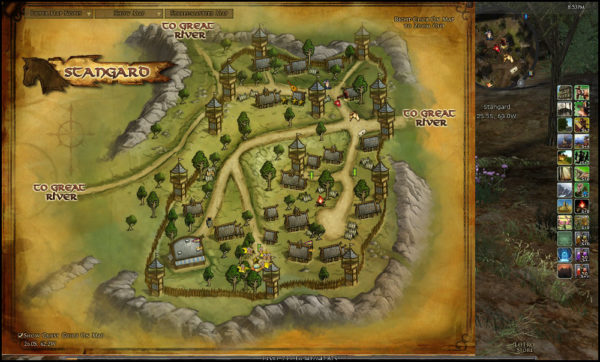
This is the result when going to open the map while using the JRR *B* UI skin. You’ll notice it doesn’t fit the whole screen, which may not be the preferred appearance for some players.
It is probably best not to be in game before you start. The changes made with the maps will require a restart of the game anyways, so you’ll be saving yourself an extra step. For the purposes of this guide, I have chosen the skin “JRR *B*” to modify and restore its map to the full size.
1 – Locate your folder containing the JRR skins files. Generally, this should be located within ‘Documents’ – ‘The Lord of the Rings Online’ – ‘UI’ – ‘skins’ – ‘JRR Skins collection’.

(Step 1) – The JRR skin folder should likely be located within your Documents/LoTRO/UI/skins folder.
2 – Next, you will want to open the folder for which skin(s) you wish to restore the full-screen map. It will be necessary to repeat the following steps for each skin whose map you want to restore.
3 – Upon opening the skin folder, locate the sub-folder titled ‘_SkinDefinition’. If you do not see such a folder, that skin may have more than one size available in game. If this is the case, locate the folders that contain words like ‘large’ or ‘short’. Treat each of these like a separate skin (as they indeed are) – you will need to make the proper change to each in order to restore the map to the full size for that skin.

(Step 3) – Locate the folder titled “_SkinDefinition” within the specific skin you wish to restore its regular-sized map.
4 – Within that ‘_SkinDefinition’ folder, you should be able to locate an XML file titled ‘SkinDefinition’. This file contains much of the code for that skin, and contains the bit you will be removing in order to restore your map to the regular size while using that skin. In order to modify the file, you will need to open it up in some kind of text editor.
The simplest solution is probably to open it up in something like Notepad. If it doesn’t already open the file in Notepad upon double-clicking it, you can right click ‘SkinDefinition’, move the cursor down to ‘Open with’, and select ‘Notepad’. If you are more comfortable with another editor, you can probably use that, but just make sure it allows you to edit text and save the file when you’re done.
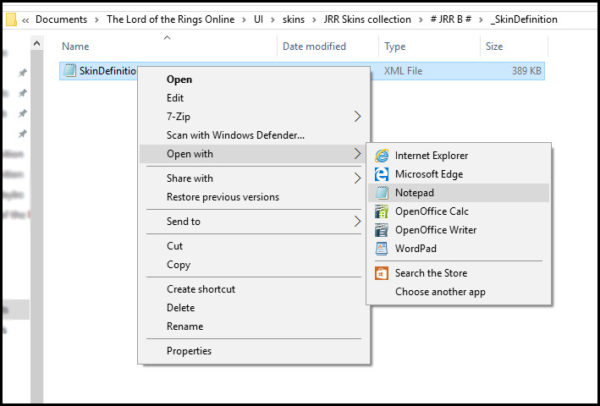
(Step 4) – In order to modify the SkinDefinition XML file, you will need to open it in some form of a text editor. Notepad makes for a great choice – right click, open with, and select Notepad from your choices.
5 – Now you should be faced with a document that has a whole bunch of code, and probably makes no sense to you. No worries, we’ll only be focusing on a small bit. Hit ‘Ctrl + F’ on your keyboard to open up the Find feature (or locate the Find feature somewhere at the top of Notepad/etc option menu). Next, type in ‘map window’ in the search bar and click on “Find Next” (or hit the Enter key). This should jump you down in the document down to a section labeled “<!– Map Window –>”.
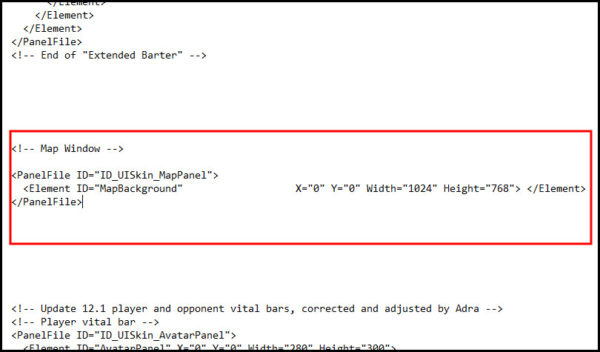
(Steps 5-6) – Upon searching for “map window”, you should find this small section located within the red box in the image above. This is the code you will be removing from the file.
6 – Now the fun part. This ‘Map Window’ section should only be about 4-5 lines of code, starting with the section title and ending with “</PanelFile>”. Select this small section, and hit the Delete/Backspace key. If you’re not totally sure if you want it deleted, you can take a screenshot (with the PrintScreen button, or the Snipping Tool if you have that handy program, though the above screenshot may suffice) so you know where the bit of code was located, and then you can Cut or Copy/Paste those couple lines of code into a blank Notepad document.
7 – After deleting those couple lines of code, you will need to save the ‘SkinDefinition’ file, either ‘Ctrl + S’ or by going up to File and clicking on ‘Save’.
8 – You should be good to go! Go ahead and launch LOTRO, load a character, then you can go into your Options – UI Settings – Current User Skin (it’s really easy once you open options if you just type in ‘skin’ in the search bar at the top), and select the skin you changed. You may need to log out and back in your character in order for the change to go through, but once you’re good, you should notice your map is back at the default full size.
As I mentioned before, you will need to repeat these steps with any of the skins whose maps you wish to restore to the full-screen setting, but now you should be able to take care of it with a fair amount of ease. Enjoy!
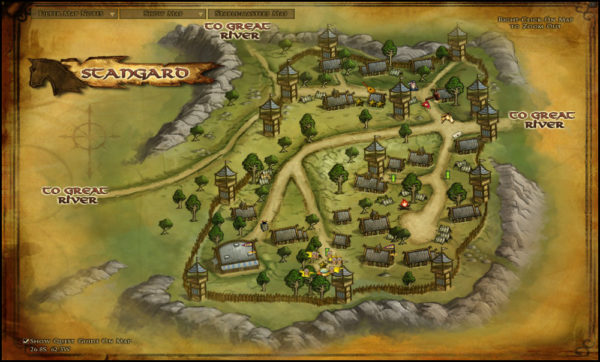
After going through the steps above, you should notice that your map should return to its default full-width size. This is using the same skin as the beginning (JRR *B*), with the fix in place.
If you have any further questions, feel free to ask here or you can reach me on Twitter @Zyngor. I am no certified professional in all this UI stuff – I just happened to come across a couple people asking about it, and figured I’d write up a little guide that hopefully helps others restore their default-sized maps while still allowing the use of the fantastic JRR UI skins. Cheers!
thank you thank you thank you thank you i cant thank you enough thank you lolol
great info thanks! Been using this UI it is a bit as you said, sometimes gives a new feeling to the game
*swordsalute* & safe travels!
Actually I prefer the unstretched version. With a simple edit you can move the map into the center of the screen. It looks much better in my opinion than stretched map.
Bravo!! Thank you for this info.